The first point has been set. Now set also the second point so the frame becomes anchored!
|
By experimenting with the Densitometer, you get an understanding of where you have your dark blue data and how it is identified.
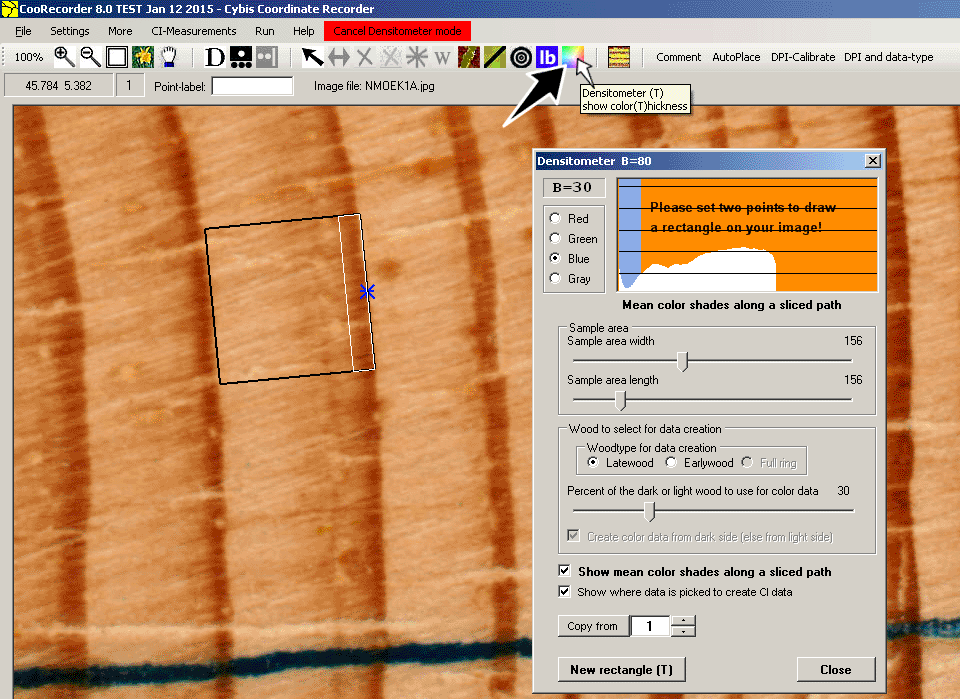
After opening the densitometer, start by setting out two points to define the origin and the direction of the densitometer frame. You can then adjust the width and the length of the frame by sliding the trackbar handles. The densitometer shows two CI values, one for the whole frame (see "B=80" in the picture above) and one for the selected latewood or earlywood, see "B=30"! (As soon as you have set the second point, the latter value (B=30) will also be printed near to the first point (the origin), see pictures below.) If you failed to place the densitometer rectangle at the right origin or with the right direction, click the "New rectangle (T)" button to start over again. You might also use the T-key on your keyboard for this. With a checkbox, you can select either method for extraction of points. In the example above the "sliced path" method is selected. The selected data area is then marked with a white rectangle which size depends both on the frame size and on the percentage set with the percentage trackbar. |
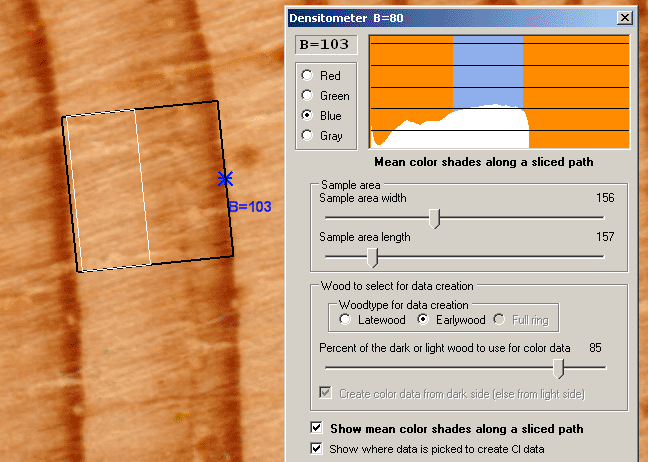
The mean color of the whole densitometer frame is 80. 85% of the Earlywood is selected (the lightest part). It has a mean color of 103.
| With Earlywood checked the white rectangle moves to the earlywood area. The curve in the upper part of the densitometer window shows how color intensity (CI) data varies along the path within the densitometer frame. The currently selected area is marked with a blue color above and along the CI curve. When you slide the percentage trackbar the blue area will change as will also the white rectangle within the densitometer frame. Note that this can only be shown when the "sliced path" method is selected. |
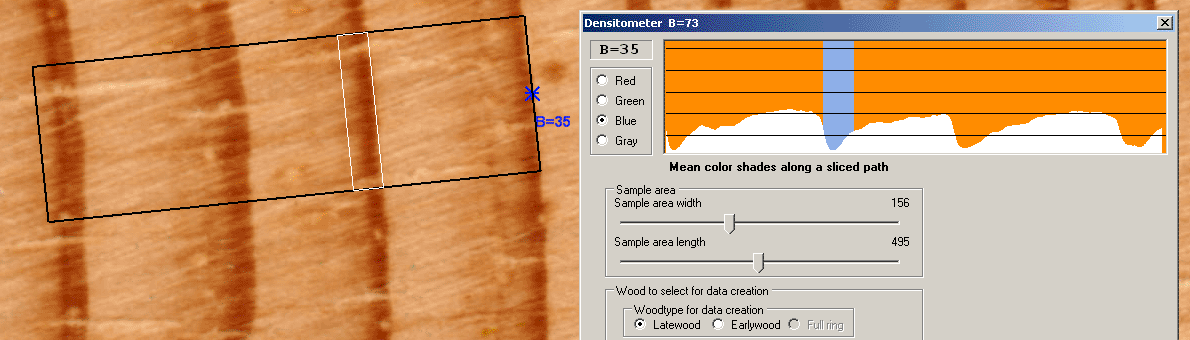
The densitometer frame now covers more than three rings. The whole densitometer frame area has a mean blue color of 73.
| The densitometer is intended to be used over just one ring. If you make the densitometer frame cover several rings, you will see how the color intensity varies along the path. The white rectangle will then jump to that position where the lightest (earlywood) or darkest (latewood, see above) points are found along the path. |
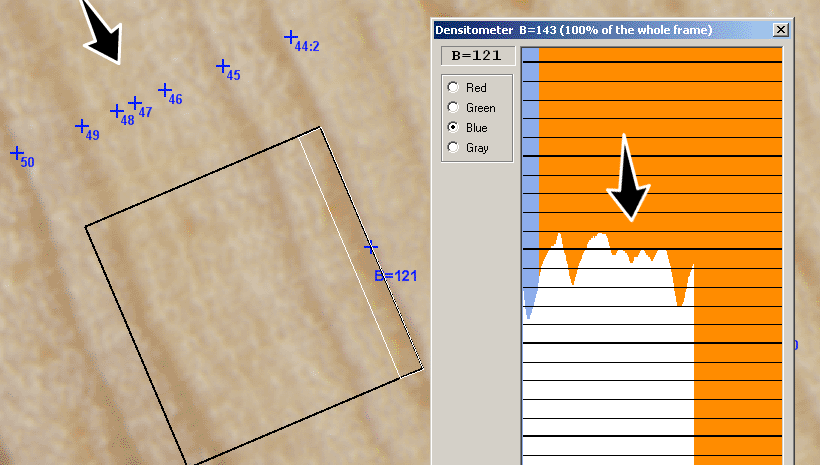
When it is difficult to decide on the actual ring pattern, then the densitometer might help.
Is there an extra ring between point 46 and 47?
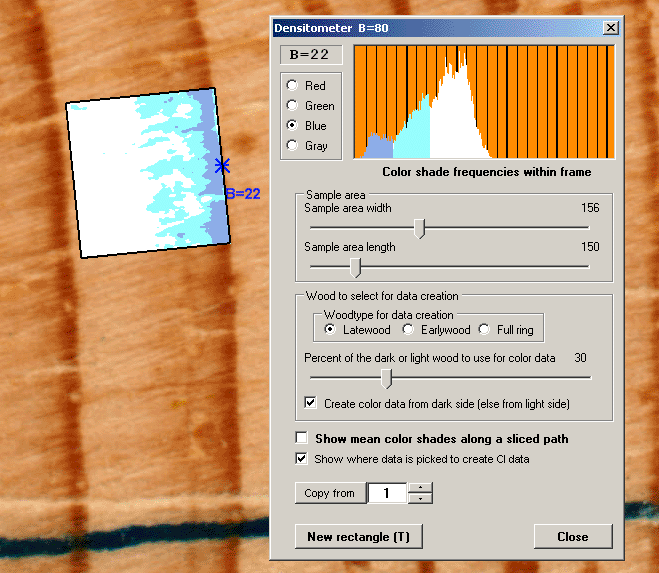
Darkest 30% of the latewood pixels selected.
|
If you select the "sorted pixels" method by unchecking "Show mean color shades along a sliced path" you will get a histogram at the top
of the densitometer window. This histogram is based on the number of different color intensity values (values in the range 0..255) found within the densitometer frame.
The values from selected latewood pixels is marked with a somewhat dark blue color while the values from unused (because of a percentage < 100%) pixels
is marked with a a light green-blue color (cyan). The white area corresponds to the earlywood data.
The copy-from button: You can easily copy data from one of your CI collectors into the Densitometer set up by using the "Copy from" button. After you have set up the appropriate number for your collector, do not forget to then really click on that "Copy from" button. :-) |

Lightest 30% of the Earlywood pixels selected.
| With Earlywood checked and "Create color data from dark side (else from light side)" unchecked the histogram will be painted in a reverse way with data from the lightest earlywood pixels being marked as blue and with data from the unselected latewood pixels marked white. |